OVERVIEW:
This article provides a beginner's guide on how to effectively dial in settings on audio compressors and how to understand the various methods of working with them. We'll give details on each setting, what it does and how to use it correctly.
TL/DR:
The threshold is the level at which the compressor starts compressing a signal. The attack time is how long the compressor takes to start compressing the signal. Release time is how long the compressor takes to stop compression once the signal falls back below the threshold.
THE BASICS:
Most audio compressors you will meet will generally have a few of the following settings that control them, or a mix of them all. Some compressors such as ‘VCA’ based circuits give you versatile control over attack, release, threshold, knee, ratio and more, whereas some ‘Opto’ compressors such as a ‘Teletronix LA-2A’ will only give you a gain and peak reduction dial. Understanding what each setting does to the signal and how it sounds will give you valuable tools in shaping your audio.
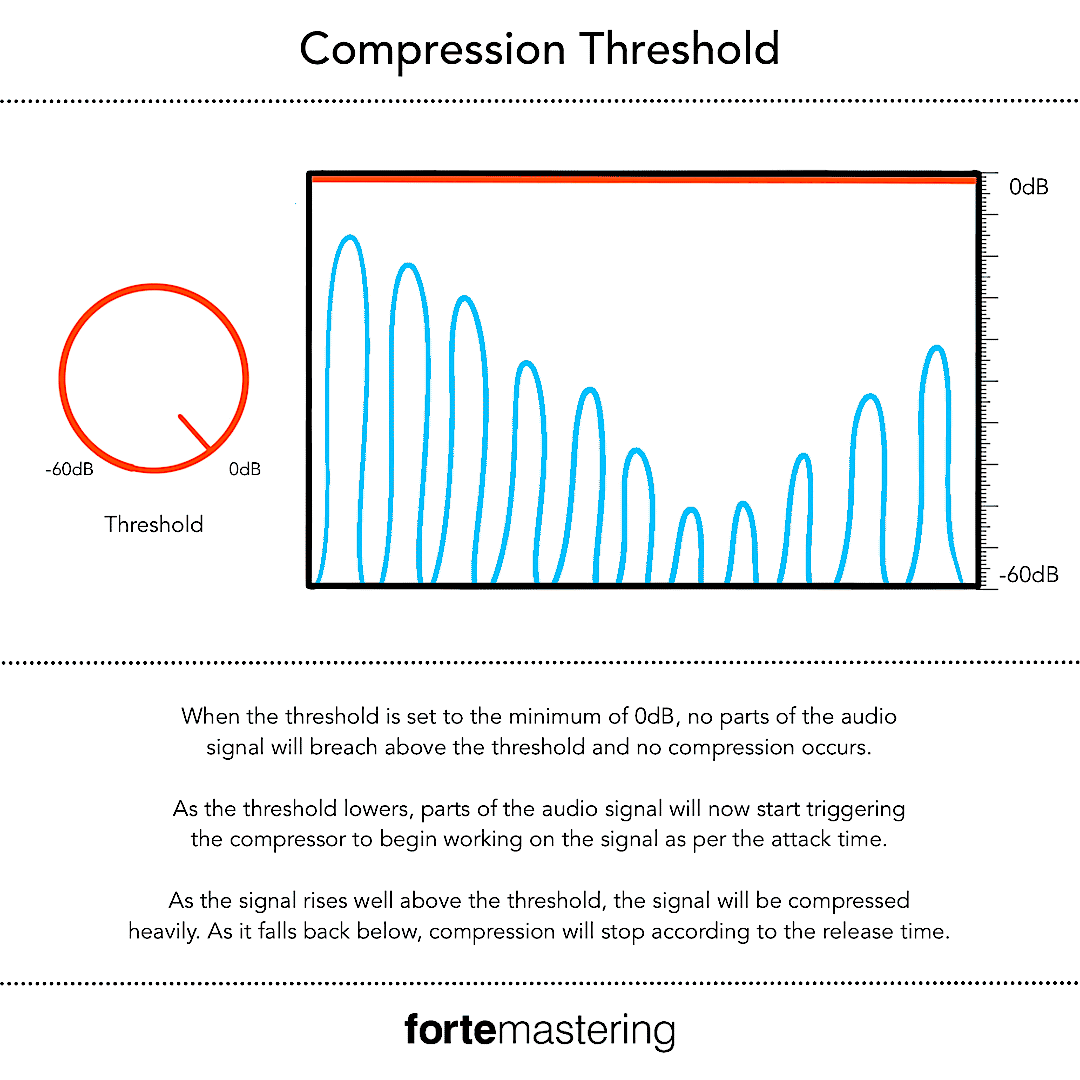
THRESHOLD:
The threshold dial is the level at which the compressor starts compressing a signal. This is measured in dB (decibels) and is showing the real-time level of your signal. This sets the point where you decide that any signal above this dedicated level will be compressed. Higher thresholds mean that the compressor will barely be working on the signal, whereas lower thresholds mean that more signal is constantly breaching the threshold and thus triggering the compressor to work.
A good rule to remember when setting this level is to focus on the part of the signal you want to address and to go no lower.
A good rule to remember when setting this level is to focus on the part of the signal you want to address and to go no lower. For example, if all you want to do is tame the spiky transient of a snare drum but leave the shape of the decay, then you would set the threshold to only be as low as where the transient meets the decay and not any further. Conversely, if you want to pump up the decay of the room sound, then set a very low threshold and you’ll start pushing the transient sound closer to the volume of the body.
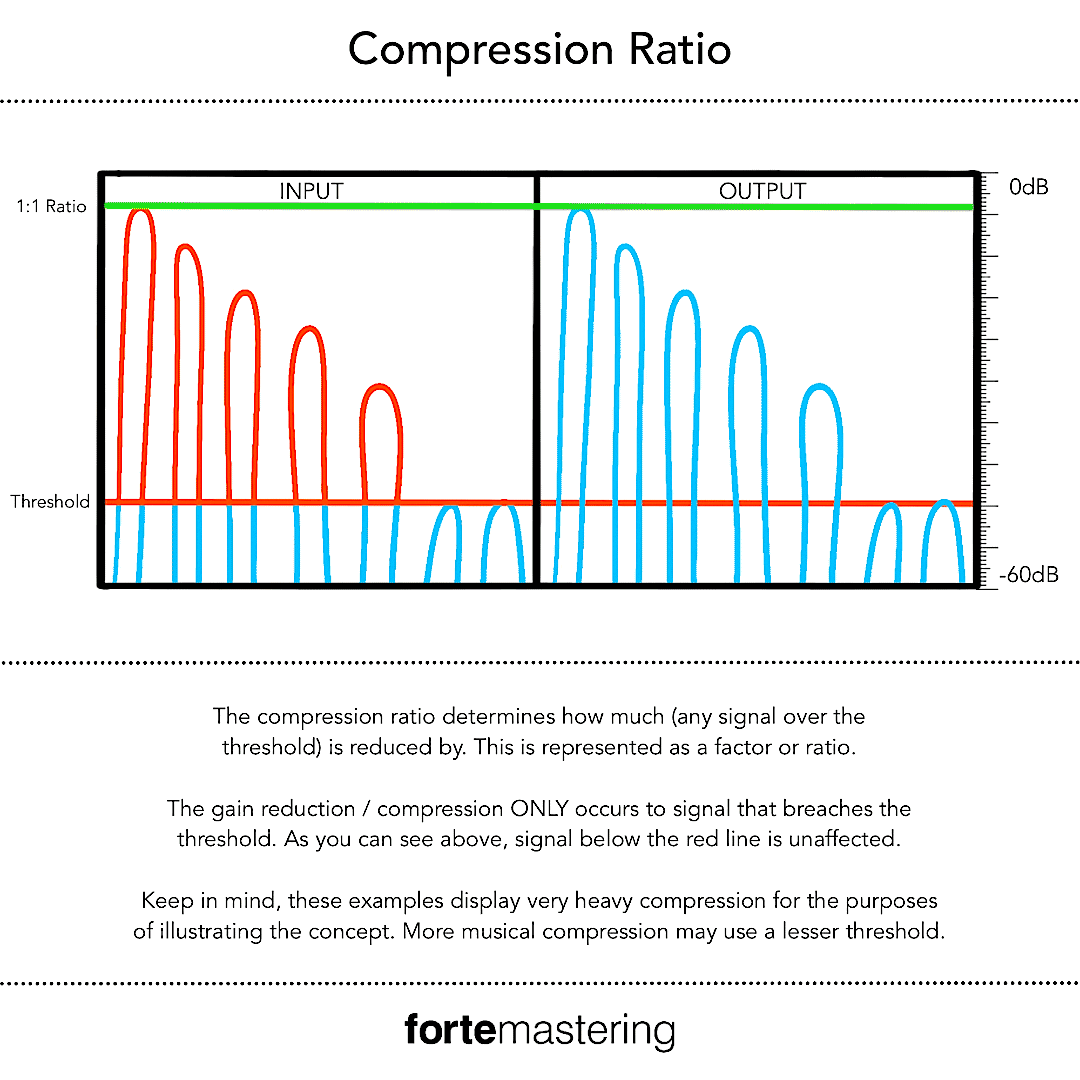
RATIO:
The ratio dial determines how much gain reduction your compressor applies to signals that have breached the threshold. The ratio is measured against the unaffected signal meaning the higher the first number is, the greater the factor by which the signal is reduced. For example, a ratio of 1:1 (or unity gain) means that no compression is occurring as 1dB over the threshold equals 1dB of output. A ratio of 2:1 means that for every 2dB over the threshold only 1dB is allowed to pass (halving the signal). The principle continues with all the ratios such as 4:1, every 4dB over the threshold, only 1dB can pass and so on (quartering the signal). It’s worth mentioning that ratios greater than 10:1 are considered ‘limiting’ where for every 10dB over, the compressor is only allowing a measly 1dB through. As you can see the second number remains the same (unaffected signal), so the higher the first number gets, the greater the factor that the compressor is reducing gain.
The ratio is measured against the unaffected signal meaning the higher the first number is, the greater the factor by which the signal is reduced.
Generally speaking, lower ratios are more gentle to your signal as they are allowing more signal to pass unaffected through the compressor. This makes lower ratios good for placing over entire mixes or masters as they will just gently smooth extraneous sounds but increase the overall body. Higher ratios on the other hand yield a much more apparent result as they are stopping much more audio from passing and only allowing a strict amount of gain out the other end. These can be useful for creative uses like flattening out room microphones so that the outputted signal has tonnes of ambient sound which can add body to a mix. Think of that slammed 80s drum sound that we heard over and over again on records like Phil Collins.
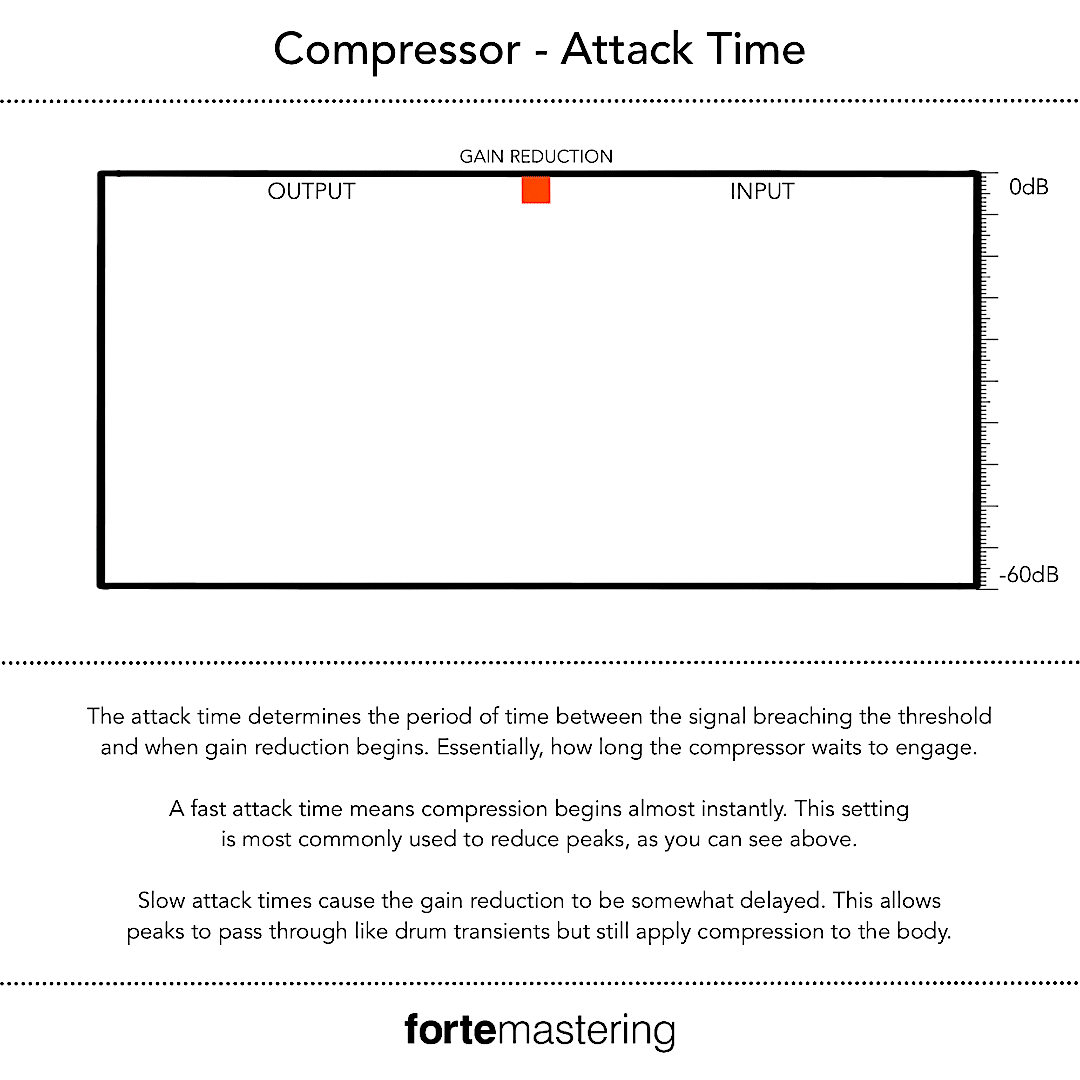
ATTACK:
Attack and release are members of the same range of control. They affect the timing of when gain reduction starts and ends. So with the attack, this determines how long it takes for the compressor to start turning the signal down once the signal has breached the threshold. The attack time is crucial in determining whether the compressor reaches its full range of gain reduction right away or more gradually.
This determines how long it takes for the compressor to start turning the signal down once the signal has breached the threshold
When setting the attack time, it’s a good idea to know what you’re trying to achieve. If you have a vocal that isn’t sitting in the mix or a guitar track that has extraneous picking sounds, then a fast attack time can help catch these transient sounds before they stick too far out of a mix. Slower attack times generally fare better on low-frequency material. This is because faster attack times can actually modulate the waveform before it’s even finished a full cycle and cause distortion. So a slow attack on things like bass guitars or synths will mellow and round out the sound.
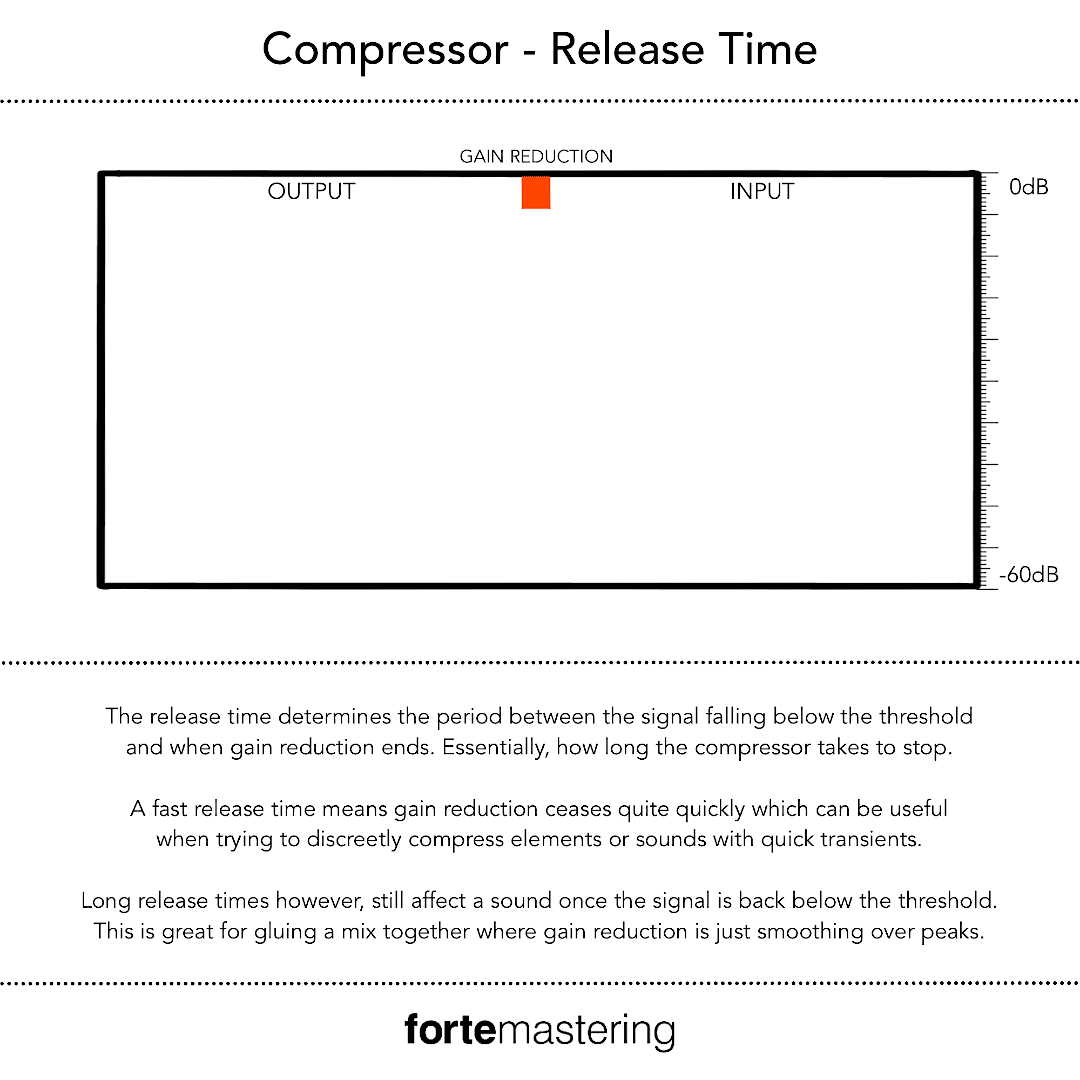
RELEASE:
As stated earlier, the release time also controls the envelope in which gain reduction occurs. Specifically, how long it takes the compressor to stop applying compression once the signal is back below the threshold. This determines whether compression will cease immediately or if it gradually lets go of the signal. Normal release times are generally set as short as possible but at the same time to avoid any pumping artefacts. This occurs when the compressor is cycling on and off too quickly between the natural flow of the music.
How long it takes the compressor to stop applying compression once the signal is below the threshold.
Start by setting a very quick release time and hearing what you don’t want to hear. Familiarise yourself with the sound of pumping and then gradually start to increase the release time until it sounds musically in time. This is the most accurate way to discretely compress a signal. A hot tip when setting the release time is to watch the gain reduction dial or VU meter if you’re so lucky to have one. Watch how the needle moves and see if you can get it to flow and move in time with the music. Stop and start the track repeatedly to see a visual representation of your attack and release times.
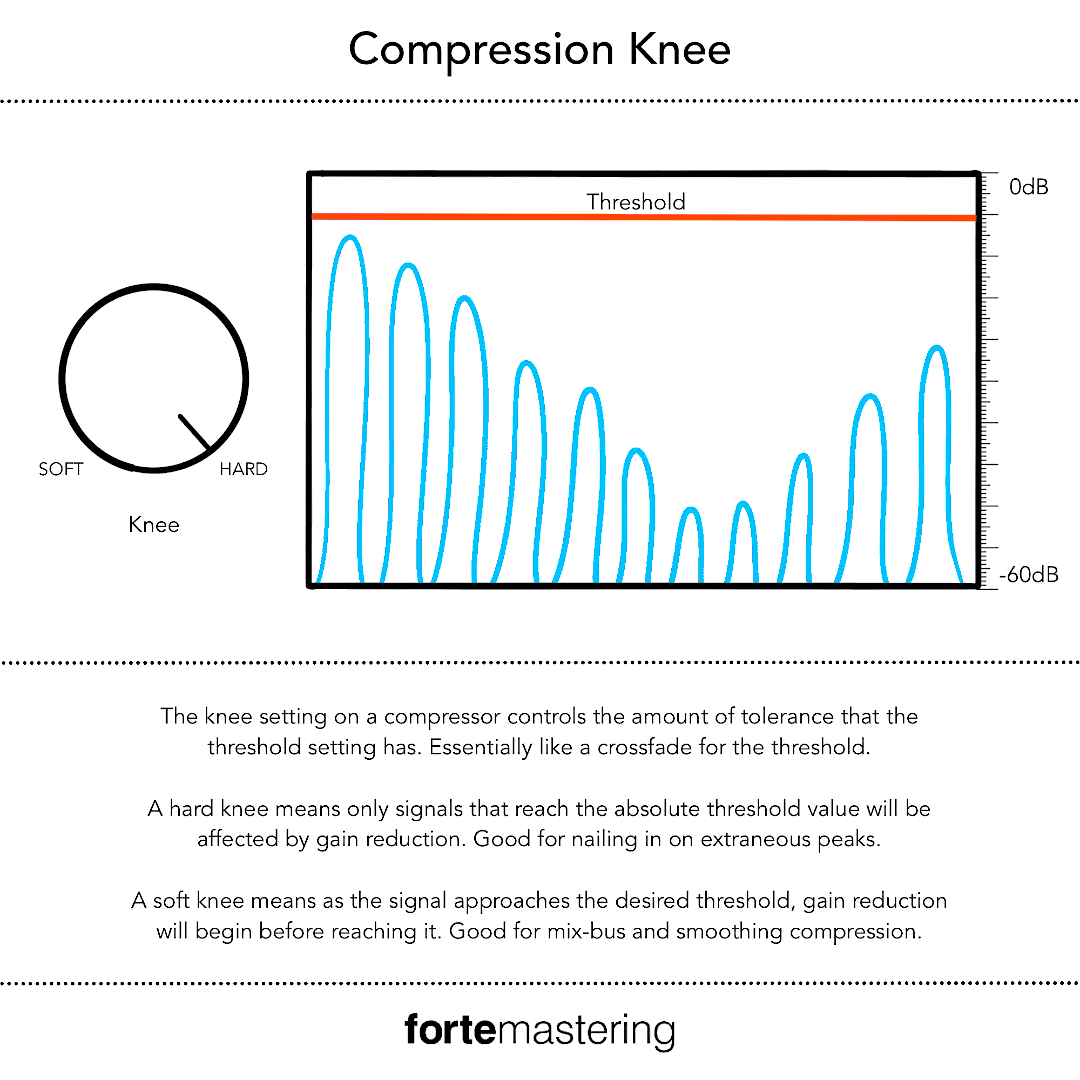
KNEE:
The knee setting determines whether the threshold is hard or soft. With hard knee compression, the signal will only ever be compressed once it passes an arbitrary level, let’s say -20dB. A soft knee, however, increases the range in which the threshold acts. So instead of the compressor only engaging in action at -20dB, increasing the knee to be soft would spread the threshold over say -25dB to -15dB. What this does is it adds some tolerance around the threshold which allows the compressor to begin gradual and smoother compression as the signal touches around the threshold. Think of it as the quality factor (Q) found on equalisers.
It adds some tolerance around the threshold which allows the compressor to begin gradual and smoother compression as the signal touches around the threshold.
Generally speaking, you’ll opt for a hard knee most of the time. This is because you’ll most likely only want the material that breaches your desired threshold to be compressed. A hard knee is useful when attempting to tame extraneous peaks but at the same time, leaving the rest of the signal untouched. A soft knee isn’t completely useless however. We often use soft knee multiband compression across our mix buses which gives us a nice musical smoothing effect. This is because as material that is beginning to stick out of a mix rises near the threshold, it is gradually and softly dealt with before it even breaches the threshold.
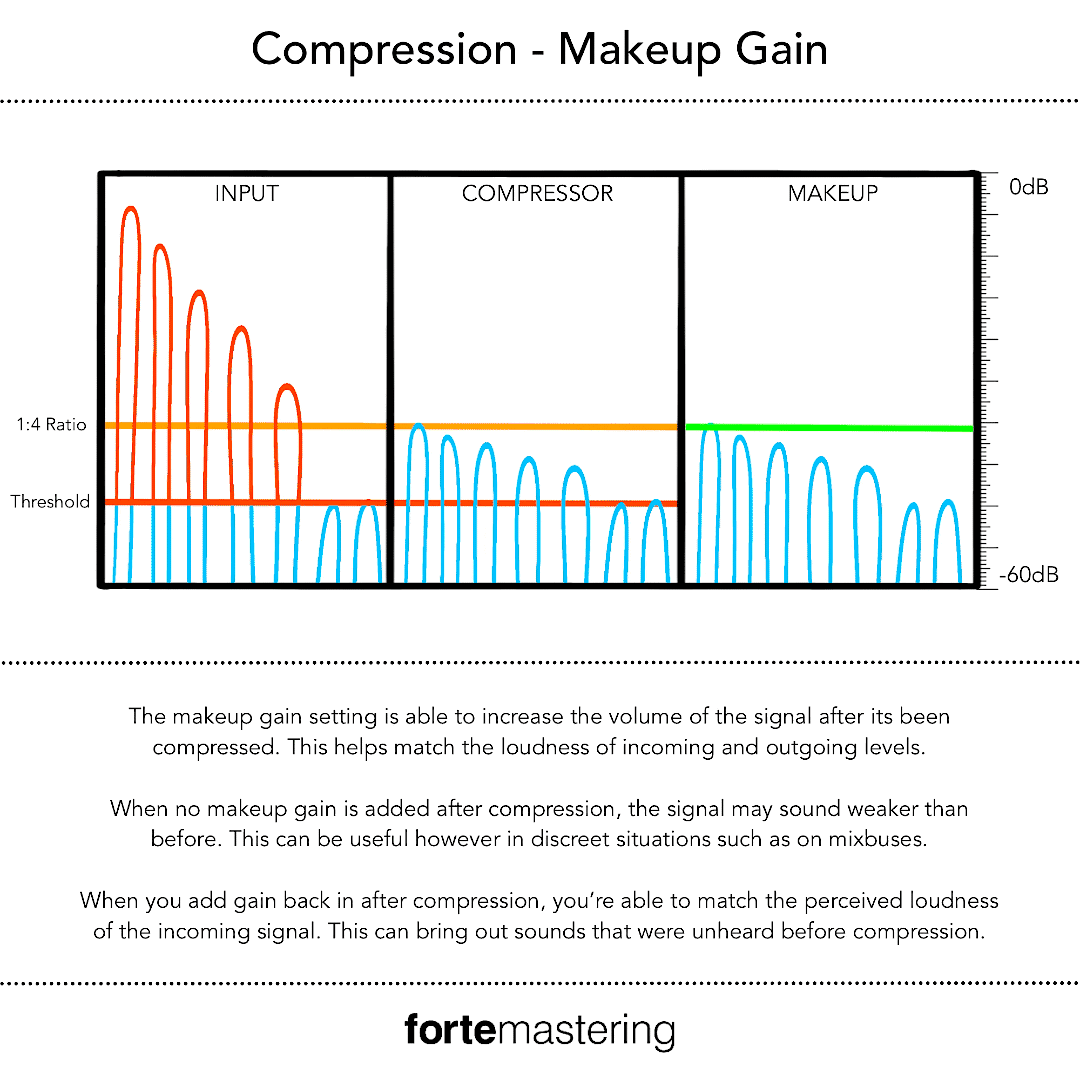
MAKEUP GAIN:
Probably the simplest of them all is how much gain you want to refund the signal on its way out. Since you’re intermittently reducing the signal’s gain, it will naturally sound quieter. To compensate for this drop off in level, you can increase the gain after compression to equal the same loudness pre-compression. In doing this, you are turning up quieter material whilst lowering loud parts and hence reducing dynamic range. This, therefore, closes the gap between loud sounds and soft sounds. Used creatively, this can yield very musical and satisfying results.
You are turning up quieter material whilst lowering loud parts and hence reducing dynamic range.
Leaving the makeup gain untouched can leave your compressed signal sounding quite weak. This can be useful when you do not want to gain match the output and take a more discreet approach. Most of the time it makes sense to just match the incoming signal and output signal to maintain good signal flow. Creative examples of driving the makeup gain include heavily compressing room mics and cranking up the makeup gain to achieve a very raw and rustic feel. On drums, it gives a real ‘boom-bap’ heavy room sound that can pump and breathe aesthetically when blended with the dry signal. Since you’re closing the gap between the loudest sounds and the softest sounds, you’ll begin to hear interesting artefacts and things in the recording that would have otherwise never been noticed.
REMEMBER:
The first rule of compression or any tool for that matter is to do no harm. If you start compressing something and it’s starting to sound weaker or it’s losing its mojo, trust your ears and scrap it or start again. For example, setting an attack time that’s too fast on drums can very quickly lead to lack-lustre drums that have no impact or punch. Remember that very quick attack times can also distort low-end frequencies found in bass instruments. So if possible, slower attack compression such as that found in ‘Opto’ compressors will generally sound nicer. Compression that’s too slow and too long on a vocal track can lead it to sound like a lumpy mess. Overcompressing a vocal can undermine a singer’s ability to utilise dynamic range and convey emotion through the rise and fall of lyrics. So be careful not to compress the emotions out of your sound. Just keep in mind, that the context of this article is using compression as a corrective tool to increase sound quality. In the creative context, however, there really are no rules and the gates are wide open to exploring new ways of using compression in interesting ways.

FINAL THOUGHTS:
You have to remember what compression is fundamentally doing to your signals, it’s shrinking the dynamics, I’ll say that again, it’s shrinking your dynamics. The reason for emphasising this is because you don’t want to overcook your record to the point where it’s lost all dynamic range and now just sounds like white noise. It’s the art of finding the balance between maintaining transients that add punchiness and snap and also taming them to smooth average listening levels and increase the body of the music. Just remember if your song is too dynamic and lacking compression, then your song will just be all transients, not much body and won’t sound full and exciting to the listener. If you overcook the compression to the point of leaving little dynamic range being left, then the music becomes lifeless and ultimately fatiguing to listen to. It’s all about finding that sweet spot! Play around with different types of compressors, overcook it, undercook it and begin the process of training your ears to the subtle sound of compression. It’s a similar learning curve to that of an instrument. Just like you have to train the muscles in your fingers to play a piano or guitar, the same is true for the tiny muscles in our ears. Compression can take moments to learn but years to understand properly. So remain patient and keep experimenting!
I very rarely use a compressor to even out dynamics. Dynamics are something that I just can’t get enough of. – Dave Pensado